This tutorial will explain how to capture the current user and add that info to a form. We automatically capture the last modified date, and using this trick we can capture last modified by as well.
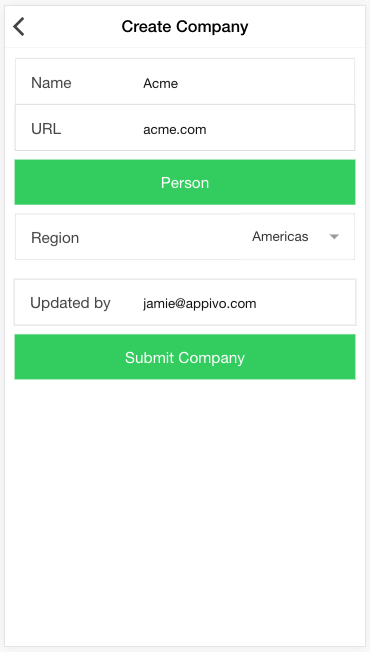
- Let’s start with a simple address book app like the one we created in Tutorial #1.
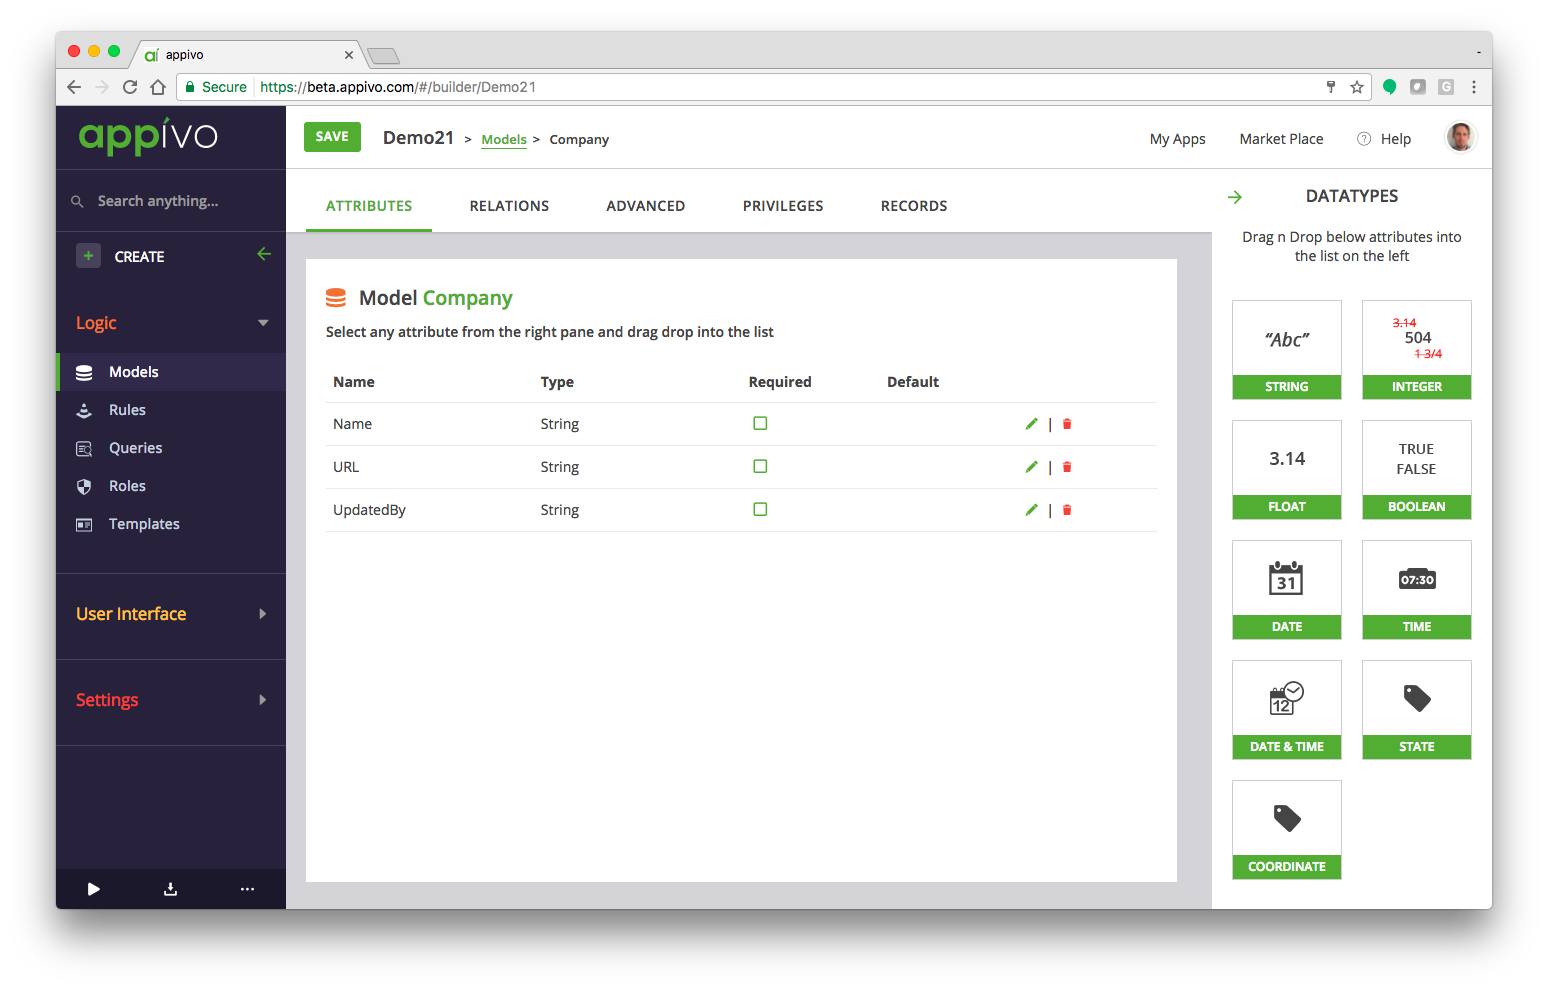
- Since this is a simplified scenario, let’s start by adding an attribute called “UpdatedBy” to the Company data model.
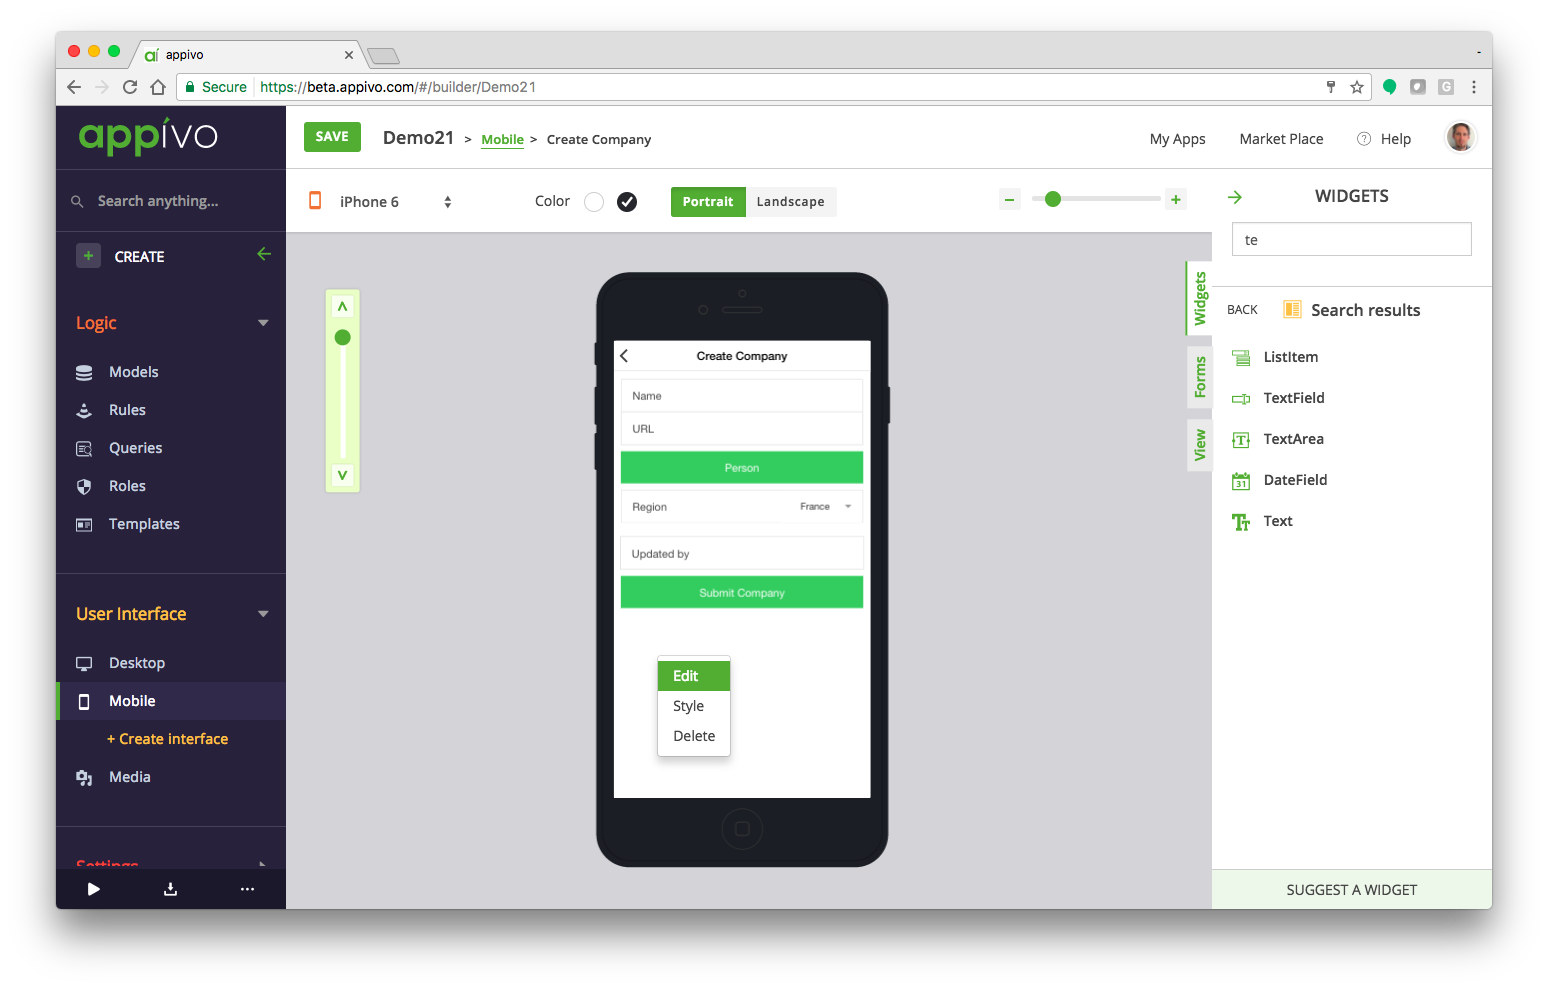
- Then go to the mobile CreateCompany view and add a TextField. You can search the Widget library for text to find it quickly.
- Configure the TextField Widget to map to the new attribute, and add a label. You might also want to change the label style (I chose inline). Also take note of the widget ID. Mine is called TextField_0.
- Now right-click on the background and select Edit.
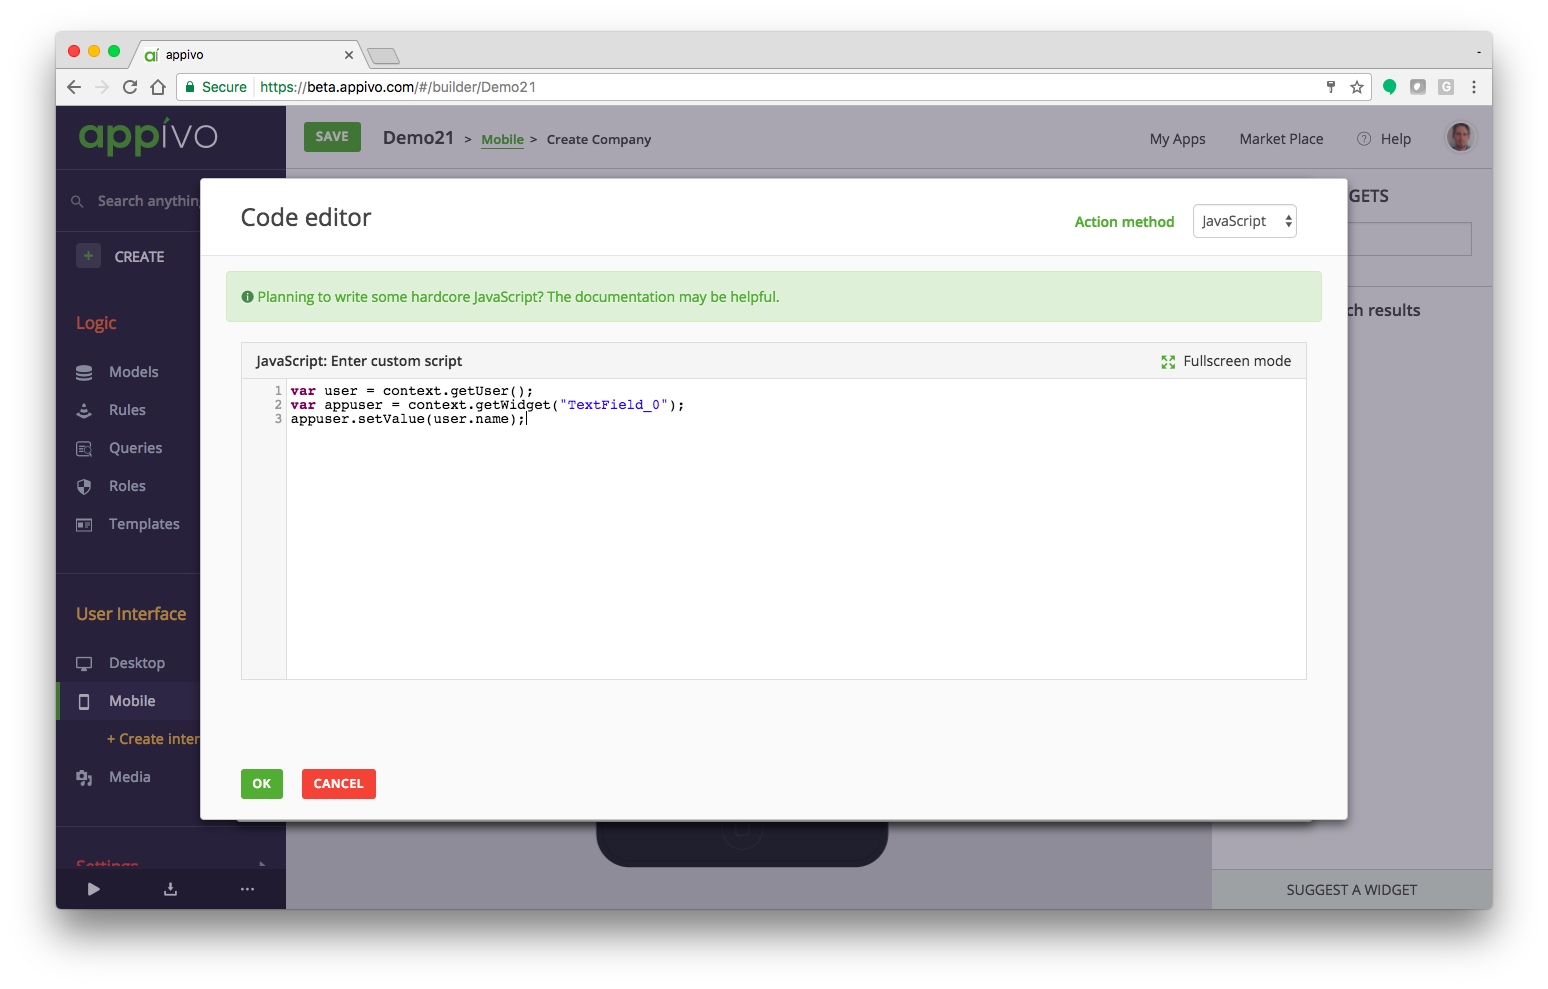
- Select the Events tab and click Add to add a script on the ViewLoad event. If there’s already a script attached to that event you can typically just click Edit and append the existing script.
- Now select JavaScript from the Action method menu, and enter the following…

var user = context.getUser();
var appuser = context.getWidget(“TextField_0”);
appuser.setValue(user.name);
- Now when that page loads, the field with automatically be populated by the current user’s email address.
- Note that the field is still editable. To make it read-only you can disable it by double-clicking it and selecting the Disabled option.